How to Add Custom Features to Your Mini Jet Boat

How to Add Custom Features to Your Mini Jet Boat

How to Add Custom Features to Your Mini Jet Boat

Mini jet boats are a blast! They're compact, agile, and perfect for zipping around lakes and rivers. But what if you want to take your mini jet boat to the next level? Adding custom features can transform it from a fun toy into a personalized watercraft that reflects your unique style and needs. Let's dive into some cool ways to customize your mini jet boat!

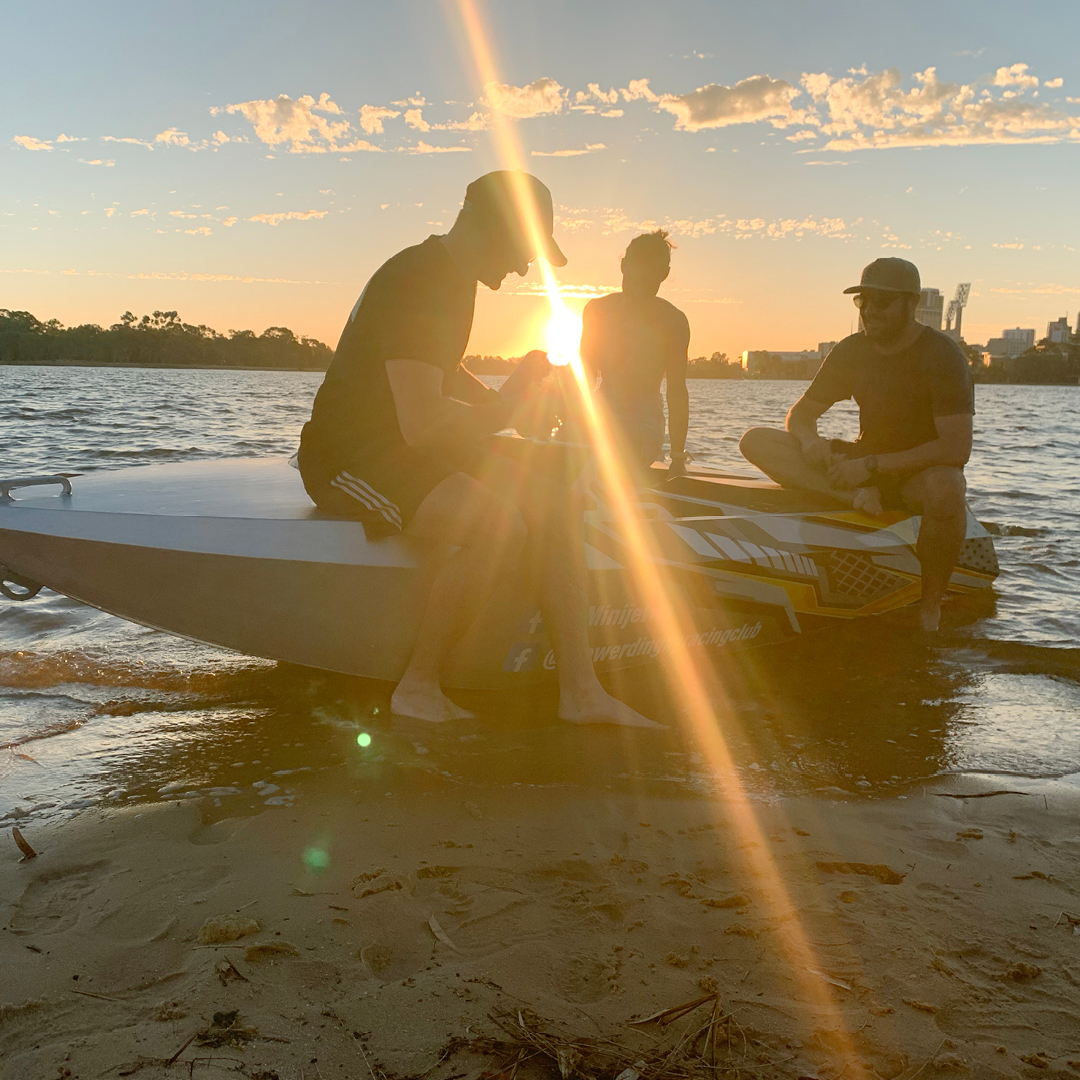
1. Power Up Your Performance

Think about the kind of thrills you want. Do you crave more speed? Increased torque for pulling skiers or tubers? Let's explore some power-boosting options!

Engine Upgrades

Swapping out your engine for a more powerful one is a significant upgrade. Consult with a qualified mechanic who specializes in jet boats to assess your existing engine and recommend the best replacement. Remember to factor in engine size, horsepower, and your desired speed and torque.

Jet Pump Modifications

Your jet pump plays a vital role in propelling your mini jet boat. A larger impeller, for instance, can increase your boat's thrust and top speed. However, modifying jet pumps should be done by experienced professionals to ensure optimal performance and avoid any potential damage.

Steering and Control

Consider adding a power steering system for smoother and easier handling, especially when maneuvering at high speeds. A trim tab system lets you adjust your boat's angle in the water, improving performance and fuel efficiency.

2. Enhance Comfort and Convenience

Let's talk about making your mini jet boat a comfortable and enjoyable experience for you and your passengers!

Custom Seating

Ditch those basic bench seats and upgrade to something more plush. Choose comfy, high-quality seats with adjustable features for a more relaxing ride. Consider adding bolster seating or even a lounge-style setup if you have the space.

Sun Protection

Don't forget about sun protection! Install a bimini top or a canopy to shield yourself and your passengers from the sun's rays. A bimini top provides shade while still allowing airflow, while a canopy offers full coverage.

Storage Solutions

Keep your belongings organized! Add storage compartments under the seats, behind the seats, or even on the side panels of your mini jet boat. This way, you'll have plenty of space for your gear, snacks, and drinks.

Music on the Water

Want to add some tunes to your boating adventures? Install a marine-grade stereo system, complete with speakers and a waterproof head unit. Just remember to choose marine-grade components that can withstand the elements.

3. Style it Up: Personalize Your Look

Make your mini jet boat stand out! It's time to add a personal touch with some styling upgrades.

Custom Paint Job

A fresh coat of paint can completely transform your mini jet boat's look. Choose a vibrant color scheme that reflects your personality. Consider incorporating graphics, stripes, or even your own unique design for a truly personalized look.

Deck and Hull Modifications

Add some flair to your mini jet boat's deck and hull. Replace the standard deck with a custom-made one that features integrated cup holders, storage compartments, or even a mini bar! You can also add non-slip surfaces for increased safety.

LED Lighting

Upgrade your boat's lighting with a set of LED lights. They not only look amazing, but they are also energy-efficient and provide brighter illumination, making your mini jet boat stand out on the water.

4. Safety First: Don't Compromise

While customization is fun, don't forget about safety. Always prioritize safety features when adding new components to your mini jet boat.

Navigation Lights

Install proper navigation lights, including running lights, sidelights, and stern lights, to ensure visibility at night and during low-light conditions.

Safety Equipment

Equip your mini jet boat with essential safety gear, including:

  • Life jackets for all passengers
  • A fire extinguisher
  • A first-aid kit
  • A whistle
  • A throwable flotation device
  • A marine radio or a handheld VHF radio for communication
  • 5. Plan Your Project and Budget

    Before you dive headfirst into customization, take some time to plan out your project. Consider these steps:

    Define Your Goals

    What do you want to achieve with your mini jet boat customizations? Increased speed? More comfort? A unique look?

    Research and Inspiration

    Explore online resources, boating forums, and magazines to gather ideas and research different customization options. Check out other mini jet boats for inspiration.

    Create a Budget

    Estimate the cost of each customization you're considering. Set a budget and prioritize the features that are most important to you.

    6. Get Professional Help

    While many customizations can be DIY projects, it's always wise to seek professional help, especially for more complex modifications. Consult with a qualified marine mechanic or a specialist in mini jet boat customization.

    Commonly Asked Questions

    Q: How much does it cost to customize a mini jet boat?

    A: The cost of customization can vary greatly depending on the type and complexity of the features you add. Simple upgrades like custom seats or a stereo system might cost a few hundred dollars, while more extensive modifications like engine swaps can cost thousands. It's best to get quotes from professionals to estimate the cost.

    Q: Is it safe to customize my mini jet boat?

    A: Yes, it's safe to customize your mini jet boat as long as you follow proper safety guidelines and use high-quality materials and components. Always consult with a professional to ensure that any modifications are done correctly and don't compromise the boat's integrity.

    Q: Where can I find parts and accessories for my mini jet boat?

    A: You can find a wide range of parts and accessories for mini jet boats online, at marine supply stores, and at specialized jet boat dealerships. Always ensure that any parts you purchase are compatible with your boat's make and model.

    Q: What are some popular customization trends for mini jet boats?

    A: Some popular trends include adding high-performance engines, upgrading to custom seats, installing marine-grade stereo systems, and personalizing the boat's look with custom paint jobs and LED lighting.

    Customizing your mini jet boat is a great way to make it your own and enhance your boating experience. With some planning, research, and maybe a little help from professionals, you can transform your mini jet boat into a personalized watercraft that reflects your style and needs. So, get creative, explore the possibilities, and enjoy your customized mini jet boat adventures!

    Share:

    Wooden Sailboat Construction Plans with Easy-to-Follow Instructions

    Wooden Sailboat Construction Plans with Easy-to-Follow Instructions

    Wooden Sailboat Construction Plans with Easy-to-Follow Instructions

    Building a wooden sailboat from scratch is a challenging and rewarding undertaking. It requires meticulous planning, careful craftsmanship, and a deep appreciation for the beauty and utility of wood. This guide will provide you with detailed instructions and comprehensive plans to help you embark on this exciting journey.

    Choosing Your Sailboat Design

    The first step is to select the sailboat design that best suits your needs and skill level. There are countless boat designs available, ranging from simple dinghies to elaborate yachts. Consider the following factors:

    • Length and Beam: Determine the size of the boat you want to build. Smaller boats are easier to handle and build, while larger boats offer more space and stability.
    • Sail Area: The sail area determines the boat's speed and maneuverability. Choose a design with an appropriate sail area for your intended use.
    • Hull Shape: The hull shape influences the boat's performance and stability. Explore different hull designs, such as displacement hulls, planing hulls, and multihulls.
    • Construction Method: Consider the construction method that aligns with your skill level and resources. Popular methods include stitch-and-glue, strip-planking, and carvel planking.
    • Budget: The cost of materials and tools will vary depending on the design and construction method. Set a realistic budget and research the price of materials.

    Gathering Materials and Tools

    Once you've chosen your design, it's time to gather the necessary materials and tools. The specific materials will vary based on the boat's design and construction method. Here's a general list of common materials:

    • Wood: Choose high-quality marine-grade plywood or solid wood for the hull, deck, and structural components. Common choices include cedar, mahogany, oak, and marine plywood.
    • Epoxy Resin and Hardener: Epoxy is essential for bonding wood and providing water resistance.
    • Fiberglass Cloth: Fiberglass cloth reinforces the wood structure and creates a watertight hull.
    • Fasteners: Choose marine-grade screws, bolts, and rivets for secure and corrosion-resistant connections.
    • Paint and Varnish: Protect the wood from the elements with marine-grade paint and varnish.
    • Sails: Select sails that are appropriate for the boat's size and design.
    • Hardware: Acquire necessary hardware components, including cleats, blocks, winches, and rigging.

    Essential tools for wooden sailboat construction include:

    • Power Tools: A jigsaw, router, drill, and sander are essential for shaping and assembling the boat.
    • Hand Tools: Chisels, planes, hammers, and screwdrivers are indispensable for detailed work.
    • Measuring and Marking Tools: A tape measure, ruler, protractor, and marking pencil are crucial for accuracy.
    • Safety Gear: Wear safety glasses, gloves, and dust masks to protect yourself while working.

    Boat Construction Process: Step-by-Step Guide

    The construction process can be broken down into distinct steps, providing a systematic approach to building your sailboat:

    1. Planning and Preparation

    Before starting construction, ensure you have a well-organized workspace and a detailed understanding of the plans.

    • Review Plans: Carefully study the plans, paying attention to dimensions, angles, and construction details.
    • Layout: Mark the wood according to the plans, ensuring accurate measurements and precise cutting.
    • Prepare Work Area: Create a clean and organized workspace with adequate lighting and ventilation.

    2. Hull Construction

    Constructing the hull is a crucial step, as it forms the foundation of the boat.

    • Cutting and Shaping: Cut and shape the wood components using power tools and hand tools.
    • Assembling Frames: Build the frame of the boat using the provided plans. This involves joining the ribs and stringers to create the desired hull shape.
    • Planking: Attach the planking to the frame, ensuring a smooth and watertight hull. This step involves careful fitting and gluing of the planks.
    • Epoxy and Fiberglass: Coat the hull with epoxy resin and fiberglass cloth to strengthen and seal the wood. This step involves multiple layers of epoxy and fiberglass.

    3. Deck Construction

    Build the deck on top of the hull, creating a platform for sailing and walking.

    • Framing: Construct the deck framing using wood beams and stringers.
    • Planking: Attach the deck planking to the frame, ensuring smooth and watertight surfaces.
    • Coaming: Install the coaming, which is a raised rim around the deck to prevent water from entering the boat.

    4. Interior and Systems

    Create the interior of the boat and install essential systems.

    • Bulkheads: Install bulkheads to divide the interior into compartments for storage and safety.
    • Cabin: Build the cabin, if required, providing shelter and accommodation.
    • Electrical System: Install wiring for navigation lights and other electrical components.
    • Plumbing: Install plumbing for fresh water and sanitation.

    5. Rigging and Finishing

    Complete the rigging and finish the boat for sailing.

    • Rigging: Attach the mast, boom, and sails to the boat according to the plans.
    • Hardware: Install cleats, blocks, winches, and other hardware for controlling the sails and managing the boat.
    • Painting and Varnishing: Protect the boat with a durable paint and varnish finish.

    Tips for Success

    Here are some tips to ensure a successful sailboat construction project:

    • Read and Understand Plans: Thoroughly review the plans before starting construction.
    • Accuracy is Key: Precise measurements and careful cutting are essential for a well-built boat.
    • Patience is a Virtue: Boatbuilding takes time and patience. Don't rush the process, allowing for proper curing of epoxy and fiberglass.
    • Seek Guidance: Consult with experienced boatbuilders or join a boatbuilding club for advice and support.
    • Enjoy the Process: Building a wooden sailboat is a rewarding experience. Embrace the challenge and appreciate the craftsmanship involved.

    Conclusion

    Building a wooden sailboat from scratch is a challenging but deeply fulfilling journey. By following these comprehensive plans and instructions, you can embark on this exciting project and create a beautiful and functional vessel. Remember to plan meticulously, work diligently, and appreciate the craftsmanship involved in bringing your sailboat to life.

    Share:

    DIY Wooden Boat Building for Beginners: Step-by-Step Guide

    DIY Wooden Boat Building for Beginners: Step-by-Step Guide

    DIY Wooden Boat Building for Beginners: A Step-by-Step Guide

    Building a wooden boat from scratch is a challenging but rewarding project. It's a journey that blends woodworking skills, patience, and a deep appreciation for craftsmanship. Whether you're drawn to the elegance of a classic sailboat or the practicality of a sturdy rowboat, this guide will walk you through the fundamental steps, making it accessible for beginners.

    While it might seem daunting at first, remember that building a boat is a process. Just like learning any new skill, it's about taking it one step at a time. Let's get started!

    1. Choosing Your Boat Design

    The first step in this exciting adventure is selecting your boat design. This might feel overwhelming at first, but consider these factors:

    Type of Boat:

    • Rowboat: Simple and versatile, perfect for paddling around a lake or calm waters.
    • Sailboat: Adds a touch of adventure, suitable for exploring open waters.
    • Kayak: Offers a more intimate experience, ideal for maneuvering through narrow waterways.
    • Canoe: A classic choice, perfect for leisurely paddles with friends or family.

    Skill Level:

    Start with a design that aligns with your experience. Some designs are simpler, while others require more advanced woodworking techniques. If you're a beginner, it's best to choose a plan that's designed for beginners.

    Available Resources:

    Consider your access to tools and materials. Some plans might require specialized equipment or exotic woods. Don't hesitate to ask local boat builders or woodworking communities for advice.

    2. Gathering Materials and Tools

    Once you've chosen your design, it's time to gather the necessary materials and tools. Here's a general list, but your specific requirements will vary based on the plan:

    Wood:

    • Marine-grade plywood: Provides strength and moisture resistance.
    • Cedar: Known for its durability and natural rot resistance.
    • Oak: Offers strength and a classic look.
    • Mahogany: A beautiful and strong wood, often used for boat building.

    Hardware:

    • Fasteners: Use marine-grade screws, bolts, and nails for optimal durability.
    • Epoxy resin and hardener: Creates a strong and watertight bond.
    • Fiberglass cloth: Adds extra strength and waterproofing.
    • Paint and varnish: Protects the wood and adds a beautiful finish.

    Tools:

    • Table saw: For making precise cuts.
    • Circular saw: For rough cuts and trimming.
    • Hand tools: Chisels, planes, hammers, screwdrivers, and a drill.
    • Measuring tools: Tape measure, protractor, and ruler.
    • Safety gear: Gloves, eye protection, dust mask, and ear protection.

    3. Understanding Boat Construction Techniques

    Before jumping into the build, it's crucial to grasp some fundamental boat construction techniques. These methods ensure a strong and watertight hull:

    Planking:

    Planking involves attaching thin strips of wood (planks) to the boat's frame to form the hull. There are various techniques, including:

    • Carvel planking: Planks are laid edge to edge, creating a smooth hull surface.
    • Clinker planking: Planks overlap, resulting in a stronger and more traditional look.

    Framing:

    The boat's frame provides structural support. It's typically built using ribs, stringers, and keel. Understanding how these elements connect is essential for building a stable hull.

    Stem and Stern:

    These are the front and back ends of the boat. They are carefully shaped and attached to the frame to provide a strong and watertight seal.

    4. Building the Boat: A Step-by-Step Guide

    Now comes the exciting part â€" building your boat! This guide focuses on the essential steps, but always follow the specific instructions provided in your chosen boat plan:

    Step 1: Building the Frame

    Begin by building the frame according to your boat plan. This typically involves cutting and assembling the keel, ribs, and stringers. Make sure all joints are tight and secure.

    Step 2: Planking the Hull

    Start planking from the keel and work your way up. Cut planks to size and use your chosen planking method. Ensure a tight fit between planks and use epoxy to secure them.

    Step 3: Shaping the Hull

    After planking, you'll need to shape the hull. This involves using planes and chisels to create the desired curves and contours. Take your time and refer to your plans for guidance.

    Step 4: Adding the Deck and Interior

    Construct the deck and interior according to your plan. This might involve installing seats, compartments, and other features.

    Step 5: Finishing Touches

    Once the hull is built, apply a layer of fiberglass cloth and epoxy for added strength and waterproofing. Sand the hull smooth and apply paint or varnish for protection and beauty.

    5. Launching and Enjoying Your Boat

    Congratulations! You've successfully built your wooden boat. The moment you launch it into the water is a true testament to your hard work and dedication. Remember to:

    • Test the boat carefully: Make sure it floats properly and there are no leaks.
    • Wear appropriate safety gear: Life jackets are essential.
    • Start with calm waters: Gain experience before venturing into more challenging conditions.

    Commonly Asked Questions

    How long does it take to build a wooden boat?

    The time required depends on the boat's size and complexity, your skill level, and the time you dedicate to the project. It can range from a few months to several years.

    How much does it cost to build a wooden boat?

    Costs vary depending on the wood, tools, and other materials you use. Expect a range from a few hundred to several thousand dollars.

    Is it really possible for a beginner to build a wooden boat?

    Yes! Many beginner-friendly boat plans are available. Start with a simpler design, take your time, and don't be afraid to ask for help along the way.

    What are some helpful resources for beginners?

    There are many online resources, books, and local boat building communities that can provide support and guidance. Visit boat building forums, search for online tutorials, and consider joining a local boat building club.

    Building a wooden boat is a journey that combines skill, patience, and passion. Embrace the process, celebrate your progress, and enjoy the immense satisfaction of creating something beautiful and functional with your own hands.

    Share:

    How to Build a Wooden Boat with Free Plans for Beginners

    How to Build a Wooden Boat with Free Plans for Beginners

    Building a Wooden Boat from Free Plans: A Beginner's Guide

    The allure of a wooden boat is undeniable. The graceful lines, the warm scent of wood, and the satisfaction of building something with your own hands â€" it's a dream shared by many. But for beginners, the prospect of tackling such a project can seem daunting. Fortunately, with the right resources and a bit of determination, building a wooden boat can be an achievable and rewarding experience.

    Finding Free Boat Plans

    The first step is finding a suitable set of plans. Thankfully, there are numerous free resources available online. Websites like Duckworks Magazine and Boat Plans offer free plans for various boat types, ranging from simple dinghies to more complex sailboats.

    When choosing your plans, consider factors like:

    • Boat type: What kind of boat do you envision? A rowboat, kayak, sailboat, or something else?
    • Skill level: The plans will indicate the level of experience required. Start with something simpler if you're new to boat building.
    • Materials: Do you have access to the necessary wood types? Some plans might require specific wood types.
    • Size and dimensions: Choose a boat that fits your storage and transportation capabilities.

    Gathering Materials and Tools

    Once you have your plans, you'll need to gather the necessary materials and tools. This can be a bit of a learning curve, but here's a basic rundown:

    Wood

    The plans will specify the types and quantities of wood required. Here's a brief overview of common boatbuilding woods:

    • Cedar: Lightweight and rot-resistant, ideal for smaller boats.
    • Mahogany: Strong, beautiful, and traditionally used in boatbuilding.
    • Oak: Durable and water-resistant, well-suited for heavier boat components.
    • Pine: Affordable and easy to work with, but less durable than other options.

    Tools

    While the specific tools will vary depending on the boat's complexity, you'll likely need:

    • Hand saws: For cutting wood to length.
    • Power drill: For drilling holes for fasteners.
    • Sanding tools: For smoothing wood surfaces.
    • Clamps: For holding wood together while building.
    • Measuring tools: Accurate measurement is crucial in boatbuilding.
    • Safety gear: Always wear safety glasses, ear protection, and gloves.

    Building the Boat: A Step-by-Step Guide

    Now, the fun part begins: Building the boat! The plans will provide detailed instructions, but here's a general overview of the process:

    Framing the Hull

    Start by constructing the boat's frame, which is the skeleton that supports the hull. This usually involves cutting and joining wood pieces to create the ribs, keel, and stem.

    Planking the Hull

    Once the frame is complete, you'll attach the planking, which is the outer layer of the hull. This is where your carpentry skills will be tested.

    Finishing the Hull

    After planking, you'll need to smooth and finish the hull. This involves sanding, fairing (removing irregularities), and applying coats of epoxy and varnish or paint.

    Building the Deck and Other Components

    Depending on the boat design, you'll construct the deck, seats, and any other necessary components. Again, your plans will provide detailed instructions.

    Launching Your New Boat

    The moment you've been waiting for: Launching your newly built boat! This is a truly rewarding experience, and a testament to your hard work and dedication.

    Remember, building a wooden boat is a journey, not a race. Enjoy the process, learn from your mistakes, and don't be afraid to ask for help along the way. With patience, persistence, and a bit of woodworking knowledge, you can build a beautiful and functional wooden boat that you'll cherish for years to come.

    Share:

    DIY Wooden Boat Plans for Coastal and River Use

    DIY Wooden Boat Plans for Coastal and River Use

    DIY Wooden Boat Plans: Sail the Seas (or Rivers) in Your Own Craft

    Hey there, fellow boat enthusiast! Have you ever dreamed of gliding across the water in a vessel you built yourself? The allure of crafting a wooden boat from scratch is undeniable. It̢۪s a journey of skill, patience, and love that culminates in a beautiful, handcrafted masterpiece.

    This article is your guide to diving into the world of DIY wooden boat plans, from choosing the perfect design to navigating the construction process. Whether you're looking to build a sturdy river skiff for leisurely fishing trips or a sleek coastal sailboat for weekend adventures, there's a plan out there waiting to be brought to life.

    Why Build a Wooden Boat?

    Building your own boat isn't just about saving money; it's about the experience. It's a chance to connect with traditional boatbuilding techniques, learn new skills, and create something truly unique.

    • Sense of Accomplishment: The feeling of satisfaction that comes from seeing your boat take shape is unparalleled. You'll be the proud owner of a vessel that you built with your own hands.
    • Customization: You have complete control over the design, materials, and features of your boat. Want a custom fishing rod holder? No problem!
    • Quality: When you build a boat yourself, you can use high-quality materials and craftsmanship that ensures durability and longevity. You'll know exactly how it's made.
    • Learning Experience: Boatbuilding is a rewarding journey of learning new skills, from woodworking and carpentry to marine engineering and design.

    Choosing the Right Wooden Boat Plans

    The first step is finding plans that match your skills, experience, and desired boat type.

    Consider these factors when selecting your plans:

    • Skill Level: Choose plans that align with your woodworking experience. Beginner plans often focus on simpler designs like rowboats or dinghies, while experienced builders can tackle more intricate designs like sailboats or larger vessels.
    • Boat Type: What kind of boat do you envision? Are you looking for a stable fishing boat, a graceful sailboat, or a classic rowboat?
    • Size: Determine the appropriate size for your intended use and storage space. Small boats are easier to build and manage, while larger vessels demand more resources and skills.
    • Materials: Research the types of wood used in different boat designs and choose materials that align with your budget and preferences. Popular woods include cedar, mahogany, and oak.
    • Budget: Factor in the cost of materials, tools, and any specialized services you might need.
      • Where to Find Wooden Boat Plans:

        There are numerous resources available for finding quality wooden boat plans:

        • Online Retailers: Websites like Duckworks, Glen-L, and Bateau.com offer a wide selection of plans for various boat types.
        • Boatbuilding Magazines: Publications like WoodenBoat and Small Boat Journal often feature plans and articles on wooden boat construction.
        • Bookstores: Look for books specifically dedicated to wooden boat building and plans.
        • Local Boatbuilding Clubs: Joining a boatbuilding club can connect you with experienced builders, resources, and potential access to shared plans or blueprints.

        Essential Tools and Materials

        To embark on your boatbuilding journey, you'll need a toolbox of essential tools and materials. Here's a list of the basics:

        • Power Tools: A jigsaw, circular saw, drill, sander, and router are essential for cutting, shaping, and finishing wood.
        • Hand Tools: Hammers, chisels, planes, clamps, measuring tools, and a variety of screwdrivers will come in handy.
        • Woodworking Supplies: Purchase the specific types of wood and finishing materials outlined in your plans.
        • Epoxy Resin and Fiberglass: For sealing and strengthening your boat's hull, epoxy resin and fiberglass cloth are crucial.
        • Boatbuilding Supplies: Specialty items like boat screws, cleats, and hardware are available at marine supply stores.
        • Work Space: You'll need a spacious, well-ventilated workshop or garage to build your boat.

        The Boatbuilding Process

        Building a wooden boat is a meticulous process, but with careful planning and execution, it's a rewarding adventure. Here's a general overview of the steps involved:

        • Study the Plans: Familiarize yourself with the design, materials, and construction techniques outlined in your plans.
        • Cut and Shape the Hull: Using your tools and the provided plans, carefully cut and shape the wooden planks that form the hull of your boat.
        • Assemble the Hull: Join the planks together using traditional boatbuilding techniques like mortise and tenon joints or modern methods like epoxy and screws.
        • Construct the Deck and Interior: Build the deck and interior framing according to your plans, ensuring proper alignment and stability.
        • Install Systems: Install necessary systems like seating, steering, and any desired features.
        • Finishing Touches: Sand, paint, or varnish the boat to your desired finish. Apply a protective coating to the hull.
        • Launch and Enjoy! Once your boat is complete, it's time for the grand launch and to experience the thrill of sailing your own creation.

        Safety First:

        Always prioritize safety when working with tools and power equipment. Wear safety glasses, ear protection, and appropriate clothing. Be mindful of potential hazards and work in a well-ventilated area.

        Commonly Asked Questions

        Q: What's the best wood for building a boat?

        The best wood for your boat depends on your design, intended use, and budget. Popular choices include cedar, mahogany, oak, and Douglas fir. Research the properties of different woods and choose the best option for your project.

        Q: How long does it take to build a wooden boat?

        The time required to build a boat varies greatly depending on the design, size, and your skill level. Simple projects can be completed in a few months, while more complex builds can take years. Set realistic expectations and factor in the time needed for each stage of the process.

        Q: Do I need any special tools for boatbuilding?

        While you can get by with basic woodworking tools, some specialized boatbuilding tools can make the process easier. For example, a marine epoxy mixing kit and a boatbuilding jig can be helpful. Consider researching these specialized tools and determine if they're necessary for your project.

        Q: Can I build a boat in my garage?

        Yes, you can build a boat in your garage as long as you have sufficient space and ventilation. You'll need to ensure that your garage floor can support the weight of the boat during construction. Consider building the boat in sections if your garage is limited in size.

        Q: What if I run into trouble during the build?

        Don't worry, everyone runs into challenges during a boatbuilding project. Join a boatbuilding club or online forum where you can connect with experienced builders who can offer guidance and support. Also, there are numerous boatbuilding books and resources available to help you troubleshoot any issues you encounter.

        Building your own wooden boat is an incredible journey of skill, creativity, and craftsmanship. It's an experience that will leave you with a sense of accomplishment and a lifelong appreciation for the art of boatbuilding.

    Share:

    Wooden Powerboat Plans for Lightweight, Easy-to-Transport Boats

    Wooden Powerboat Plans for Lightweight, Easy-to-Transport Boats

    Building a Wooden Powerboat: Plans for Lightweight and Portable Designs

    The allure of a wooden powerboat is undeniable. The classic lines, the natural beauty of the wood, and the sense of craftsmanship that goes into building such a vessel are truly captivating. But what if you could combine these qualities with the added advantage of portability? What if you could build a wooden powerboat that's lightweight, easy to transport, and capable of taking you to your favorite fishing spot or serene lake without the hassle of a trailer?

    This article delves into the exciting world of wooden powerboat plans specifically designed for lightweight and portable designs. We'll explore the various types of plans available, discuss the key considerations for choosing the right design, and guide you through the steps of building your very own compact wooden powerboat.

    Types of Plans for Lightweight Wooden Powerboats

    The market offers a diverse range of wooden powerboat plans that cater to the needs of the portable boat enthusiast. From classic dinghies to sleek skiffs, you'll find plans for various styles and sizes to suit your preferences and intended use.

    Dinghies

    These small, open boats are renowned for their simplicity, maneuverability, and lightweight nature. They are excellent choices for casual paddling, fishing, or exploring shallow waters. Some popular dinghy designs include the "Duckie" and the "Tender," both known for their stability and portability.

    Skiffs

    Skiffs are a bit larger than dinghies, offering more space and versatility. These boats are often designed with a shallow draft, making them ideal for navigating shallow waters and beaches. Skiffs can accommodate small outboard motors, allowing for efficient propulsion. Classic skiff designs like the "Sharpie" and the "Carolina Skiff" are favored for their simplicity and stability.

    Other Lightweight Designs

    Beyond dinghies and skiffs, there are other unique and innovative designs that cater to the lightweight and portable boat enthusiast. These include:

    • Folding Boats: These boats can be collapsed and stored compactly, making them perfect for travel and storage.
    • Inflatable Boats: While not technically wooden, inflatable boats offer a lightweight and portable alternative with the added benefit of easy storage and transport.
    • Hybrid Designs: Some plans combine the lightweight nature of wooden construction with modern materials like fiberglass for enhanced strength and durability.

    Factors to Consider When Choosing a Plan

    Choosing the right plan for your lightweight wooden powerboat is crucial to ensure a successful and enjoyable building experience. Consider these factors:

    • Intended Use: Define how you plan to use the boat. Is it for fishing, paddling, or simply enjoying leisurely outings?
    • Skill Level: Evaluate your woodworking abilities. Some plans are simpler than others, offering a good starting point for beginners.
    • Size and Weight: Determine the appropriate size and weight for your needs. A smaller, lightweight boat is easier to transport, but it may have limited carrying capacity.
    • Budget: Factor in the cost of materials, tools, and any additional equipment.

    Building Your Lightweight Wooden Powerboat

    Once you've chosen your plan, you're ready to embark on the rewarding journey of building your very own wooden powerboat. Here's a general overview of the process:

    • Gathering Materials: Obtain the necessary wood, fasteners, and other materials.
    • Cutting and Shaping: Use precision tools to cut and shape the wooden components according to the plans.
    • Assembling the Hull: Join the wooden components to create the hull of the boat.
    • Adding Deck and Interior: Construct the deck and interior features based on your design preferences.
    • Finishing Touches: Apply a protective finish to the wood and add any desired accessories.

    Building a wooden powerboat requires patience, skill, and attention to detail. But the satisfaction of crafting a boat with your own hands is truly unparalleled. Remember to consult with experienced boatbuilders or join a local woodworking community for guidance and support throughout your building process.

    Share:

    Houseboat Plans for Classic Designs with Practical Features

    Houseboat Plans for Classic Designs with Practical Features

    Houseboat Plans: Combining Classic Designs with Practical Features

    The allure of a houseboat lifestyle is undeniable. Imagine waking up to breathtaking views, being surrounded by water, and having the freedom to explore new waterways at your leisure. But embarking on this journey requires careful planning, especially when it comes to designing your houseboat. Blending classic aesthetics with practical features is key to creating a functional and stylish floating home.

    Embracing Timeless Elegance

    A classic houseboat design evokes a sense of nostalgia and charm. Think traditional lines, warm wood accents, and a cozy, inviting atmosphere. Here are some design elements that capture this essence:

    Architectural Inspiration

    • Gable roofs: These iconic roofs add a timeless appeal and provide ample space for storage.
    • Overhanging decks: Create shaded areas for relaxation and dining, extending the living space outdoors.
    • Large windows: Flood the interior with natural light and offer panoramic views of the water.
    • Porches and balconies: Enhance the connection to the water and create a sense of openness.

    Materials and Finishes

    Choosing the right materials is crucial to achieving a classic look and ensuring durability. Opt for:

    • Natural wood: From teak to cedar, wood adds warmth and character to the interior and exterior.
    • Brass fixtures: Create a vintage feel and enhance the overall elegance.
    • Soft, neutral colors: Create a sense of calm and sophistication.
    • Cotton fabrics: Add comfort and a touch of traditional charm.

    Integrating Practical Features

    While aesthetics are important, a houseboat must be functional for everyday living. Incorporate these practical features:

    Efficient Space Utilization

    Houseboats often have limited space, so maximizing every square foot is essential. Consider:

    • Multifunctional furniture: Opt for pieces that serve multiple purposes, such as a sofa bed or a dining table that converts to a desk.
    • Built-in storage: Utilize built-in shelves, cabinets, and drawers to keep belongings organized.
    • Vertical space: Take advantage of vertical space with loft beds or high cabinets.

    Sustainable Solutions

    Living on a houseboat requires being mindful of the environment. Here are some eco-conscious features:

    • Solar panels: Generate clean energy to power your houseboat.
    • Water conservation: Install low-flow fixtures and consider water-saving appliances.
    • Waste management: Utilize composting systems and implement proper waste disposal methods.

    A Fusion of Style and Functionality

    Ultimately, designing your houseboat is about finding the perfect balance between classic elegance and practical features. By carefully considering both aesthetics and functionality, you can create a floating home that is as stylish as it is comfortable and efficient. Remember to consult with experienced houseboat designers and builders to ensure your dream houseboat becomes a reality.

    Share:

    Postingan Populer

    Powered by Blogger.

    Recent Posts